
What balsamic glaze is
Balsamic glaze is a thicker preparation made from balsamic vinegar, valued for its cling and concentrated taste. It is commonly added as a finishing ingredient rather than poured like a standard vinegar. Its exact sweetness and body depend on the recipe or commercial formulation. The distinction is clearest when you compare how each one coats and moves across food.
Texture and flavor
A balsamic glaze is a thicker balsamic preparation commonly used as a finishing ingredient. Its smooth, syrupy texture lets it cling to a surface instead of running off immediately, while still allowing it to be drizzled in a narrow stream. The body can range from softly flowing to quite dense, depending on how it is made.
Its flavor is more concentrated than that of many pourable balsamic vinegars, with a balance of tangy acidity and sweetness. The sweet-and-tangy character may come from the vinegar itself becoming more concentrated, or from ingredients included in a particular recipe or commercial formulation. As a result, two glazes can differ in sweetness, acidity, and thickness even when both are labeled balsamic glaze. The defining qualities are the thicker consistency and a flavor that remains noticeable in a small finishing amount.
How it differs from vinegar
Both products have balsamic flavor, but their usual body and role on food are different. Ordinary balsamic vinegar is generally freely pourable; glaze moves more slowly and is designed to stay visible on the surface.
| Feature | Balsamic glaze | Ordinary balsamic vinegar |
|---|---|---|
| Consistency | Thick and syrupy, with enough body to cling to food. | Thin and fluid enough to pour readily; age and brand can affect its body. |
| Concentration | Often has a more concentrated, sweeter-tasting profile; the degree varies by recipe and formulation. | Usually tastes more sharply acidic and less syrupy, although vinegar styles vary. |
| Typical role | Used as a finishing accent, where a small drizzle can add visible flavor. | Used as a pourable seasoning or as an ingredient in dressings and other preparations. |
| Movement across food | Falls slowly and tends to hold lines or small pools on the surface. | Runs readily over a surface and spreads more like a liquid seasoning. |
These are typical distinctions, not fixed specifications: recipes and commercial formulations vary, and some aged vinegars have more body than younger, lighter ones. Consistency is the practical clue when deciding whether a product will drizzle and cling or flow freely.
What you need
A simple balsamic reduction calls for a short list of ingredients and ordinary kitchen equipment. The vinegar supplies the base flavor, while any additions are choices rather than requirements. A saucepan and a spoon are enough to prepare and check a small batch. Keeping the base and optional accents separate makes it easy to choose the flavor you want.
Balsamic vinegar
Balsamic vinegar is the only required ingredient for a simple homemade balsamic glaze. As the liquid reduces, its existing acidity, sweetness, and fruit character become more concentrated, so the starting vinegar largely determines the finished flavor. A younger, sharper vinegar tends to produce a tangier reduction, while a naturally sweeter, more developed vinegar gives a rounder result. Choose a bottle whose flavor you enjoy on its own rather than depending on added sweetness to balance a base that tastes too sharp.
A 1- to 2-quart, heavy-bottomed saucepan is a practical size for a small batch, with enough room for the liquid to reduce without filling the pan. Keep a stainless-steel spoon or heatproof spatula nearby as a consistency-checking tool; the way the liquid clings to the utensil gives you a quick visual cue. No specialty appliance is needed for a basic stovetop reduction.
Optional flavor additions
Optional additions can give a reduction a more aromatic, savory, citrusy, or sweet character. Use one accent at a time so its effect remains easy to identify:
- Fresh thyme or rosemary: A small sprig adds a woodsy, herbal note that makes the finished reduction taste more savory.
- Garlic: One lightly crushed clove lends a mellow savory flavor, changing the glaze from purely sweet-tart to more aromatic.
- Citrus peel: A strip of lemon or orange peel contributes a bright, fragrant note without making the vinegar itself taste sweeter.
- Honey or maple syrup: A modest spoonful adds sweetness and a rounded flavor; either is optional, not a requirement for reduction.
These additions are variations, not part of the essential ingredient list. The vinegar alone works for a straightforward glaze.
Preparing the glaze
A steady reduction depends on gentle heat and close attention as the vinegar changes. Start with a saucepan on the stovetop, then watch the surface rather than relying on a fixed cooking time. The bubbling pattern and the way the liquid coats a spoon reveal how quickly it is concentrating. Remove the pan before the glaze reaches its final thickness, since cooling changes how it flows.
Heat gently
Pour the vinegar into a saucepan and set it over low to medium-low heat. Choose a pan that leaves the liquid visible across the bottom, so bubbles and changes in movement are easy to notice. Avoid starting with a hard boil: intense heat can drive off liquid quickly and make the reduction harder to control.
As the vinegar warms, look for small, steady bubbles around the edge and occasional bubbles breaking across the surface. This controlled simmer should move the liquid without making it surge or splash. If it begins to boil vigorously, lower the burner until the bubbling settles.
Reducing balsamic vinegar on the stovetop removes water gradually, concentrating its flavor and allowing its natural sugars to contribute body. Steady heat gives evaporation time to proceed evenly, so the liquid thickens progressively rather than catching or becoming sharply concentrated at the pan’s base. Stir gently from time to time, especially across the bottom, and keep the pan in view as the simmer continues. The surface will become glossier and the bubbles may change as the liquid reduces; use those visible shifts, not elapsed minutes, to guide the next step.
Watch the consistency
As the reduction proceeds, check the surface and spoon regularly; its movement provides practical clues that a homemade balsamic glaze is nearing the point to stop. Lower the heat or lift the pan away when any of these cues appears:
- Bubbling turns rapid and crowded across the surface; lower the burner until the simmer becomes gentle and the bubbles break less forcefully.
- Bubbles grow glossy and linger before bursting, while the liquid moves more slowly; the increased viscosity means the reduction is concentrating quickly.
- A spoon dipped into the pan comes out with a distinct film, and the coating runs off in a slower ribbon rather than like thin vinegar.
- A trail drawn through the liquid with a spoon briefly remains visible before flowing closed, showing that the syrup is already holding its shape.
- Foam or active bubbles begin gathering near the pan’s sides, or the surface looks unusually dense; remove the pan before the concentrated liquid turns sticky.
These signs can appear close together, so use the spoon test alongside the bubbling rather than waiting for every cue. If the coating is already pronounced and the reduction continues to bubble strongly, take the pan off the burner; residual heat can keep concentrating the liquid briefly.
Cool before judging
Remove the pan from the heat while the glaze still runs a little more freely than the thickness you want. The hot reduction can look deceptively thin, and continued cooking in the warm pan may push it past a fluid finish. If the pan is heavy or retains heat, pour the glaze carefully into a heatproof bowl to stop the cooking more promptly.
Let it cool until it is no longer warm, then tilt the bowl or let a small amount run from a spoon. Judge the cooled flow: it should fall in a smooth ribbon and settle without behaving like thin vinegar. Cooling reveals the finished consistency more reliably than judging the glaze while it is hot.
Common texture problems
Texture can be adjusted after cooking if the glaze is noticeably thinner or thicker than intended. Make one small change at a time, since reduction and cooling both affect how it flows. Check a cooled sample rather than judging the glaze only while it is hot. The spoon test gives a quick indication of whether it needs further adjustment.
Too thin
If the glaze still pours like vinegar once cool, return it to a small saucepan and heat it over low to medium-low heat. Keep it at a gentle simmer rather than a rolling boil, which can make the liquid reduce unevenly and catch on the pan. Stir occasionally, especially around the base and sides, as the volume decreases.
Reduce for another minute or two, then take the pan off the heat and let a teaspoonful cool on a plate before checking it. Hot glaze flows more freely, so the cooled sample is the better guide to its final consistency. It should coat the back of a spoon in a thin, even layer; a finger drawn through that coating should leave a clear trail briefly before the glaze flows back. If it still runs off immediately, return the pan to gentle heat and repeat the short reduction and cooling check. Stop when the cooled glaze coats the spoon without becoming tacky.
Too thick or sticky
A glaze that clings in a heavy lump or pulls into sticky threads can often be loosened without starting over. Warm it in a saucepan over low heat, stirring slowly until it becomes fluid enough to assess. Avoid boiling it again before checking: additional evaporation can make the texture denser, while a warm glaze naturally looks thinner than it will after cooling.
If warming alone is not enough, stir in a small amount of warm water or balsamic vinegar. For about ½ cup of glaze, begin with 1 teaspoon, mix until fully incorporated, then check how it falls from the spoon. Water loosens the texture with little change to the flavor; vinegar keeps the balsamic tang more pronounced. Add another teaspoon only if needed, allowing the glaze to warm and blend before each check. Cool a small sample on a plate to confirm the result, since a hot glaze may seem pourable but set thicker as it cools. Gradual additions preserve control and help prevent a thin, watery result.
Using and storing balsamic glaze
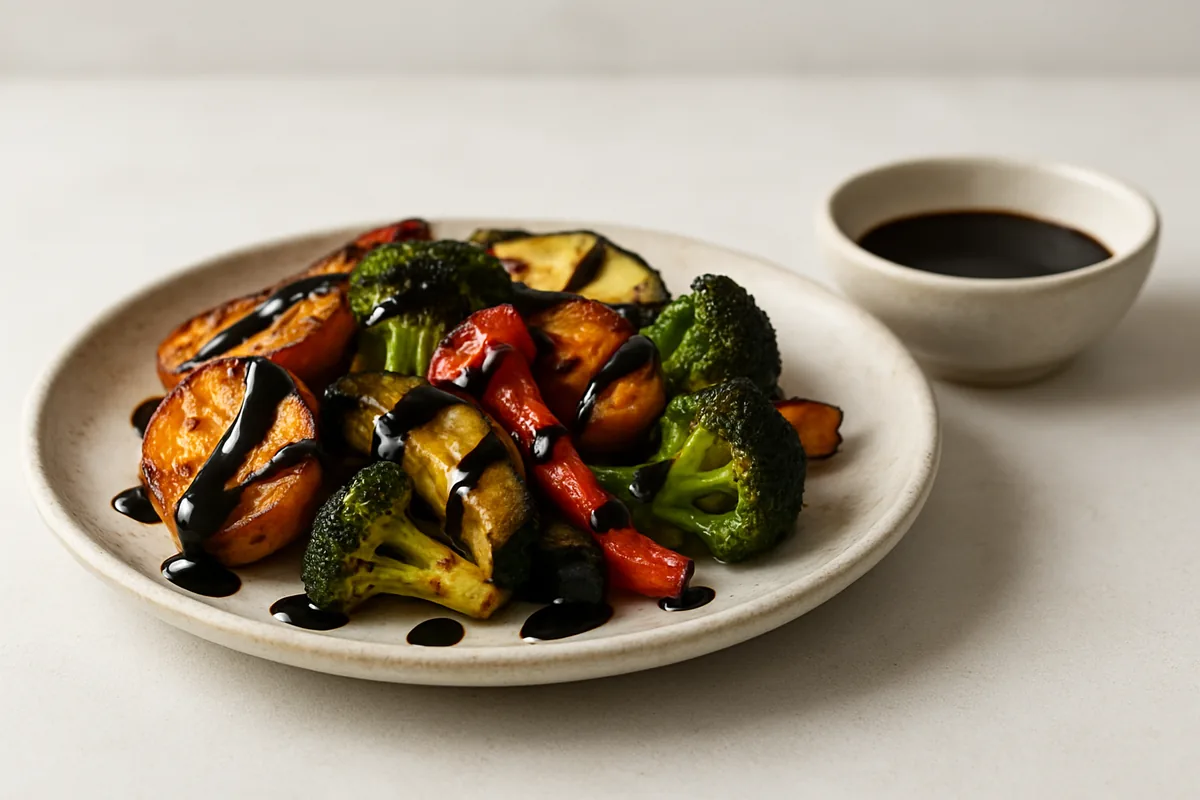
Balsamic glaze works best as a finishing accent, added in a measured drizzle rather than used like a full dressing or sauce. Its concentrated sweet-tangy flavor can complement vegetables, salads, and savory dishes when the amount stays modest. Apply it after cooking or just before serving to keep the lines distinct and the food’s own flavors clear. Storage depends on the ingredients and preparation, so keep a homemade batch cleanly covered and follow food-safety guidance suited to its contents.
Finishing foods
A thin drizzle adds contrast without covering the food beneath it. Try these balsamic glaze uses, adding the glaze at the end of cooking or just before serving:
- Finish roasted carrots, beets, or squash with a narrow zigzag after cooking; their earthy sweetness welcomes the glaze’s acidity without needing another sugary sauce.
- For a tomato-and-mozzarella Caprese salad, drizzle just before serving so the glossy lines accent ripe tomatoes and creamy cheese instead of pooling beneath them.
- On leafy salads, add a few drops over bitter greens such as arugula, then taste before adding extra dressing to keep the sweet-tangy balance clear.
- Spoon a restrained drizzle over grilled chicken or pork after cooking; savory browning and simple salt-and-pepper seasoning help balance the concentrated sweetness.
- Across a crisp-crust pizza topped with mushrooms or prosciutto, apply thin ribbons after baking, keeping the glaze distinct from the cheese and savory toppings.
- Pair a small zigzag with a firm cheese such as aged Parmesan on a snack board; serve it alongside rather than coating every piece.
Use a squeeze bottle or teaspoon for controlled lines, and start with less than you think the dish needs. The glaze should sharpen each bite, not dominate it.
Storage considerations
Storage depends on the ingredients, how the glaze was prepared, and how it was handled after cooking. A plain reduction and a version with added flavorings may call for different care, so do not assume that every homemade batch has the same storage needs or shelf life. Transfer cooled glaze to a clean, covered container, using a clean spoon whenever you serve it. Refrigerate homemade glaze unless reliable food-safety guidance for that specific preparation says otherwise; keep any directions on a commercial product’s label. Avoid leaving the container open or returning food-covered utensils to it, since that can introduce contamination. If the glaze contains fresh fruit, herbs, or other perishable additions, follow food-safety guidance that applies to those ingredients and the finished condiment. Consult your local food-safety authority’s advice for homemade preparations, and discard the glaze if its condition raises concern rather than relying on a general shelf-life estimate.